How to Add Keywords To Video Files
Ever wondered how to add keywords to your videos so they stay with the video files and get embedded into the Exif?
Here's how I do it.
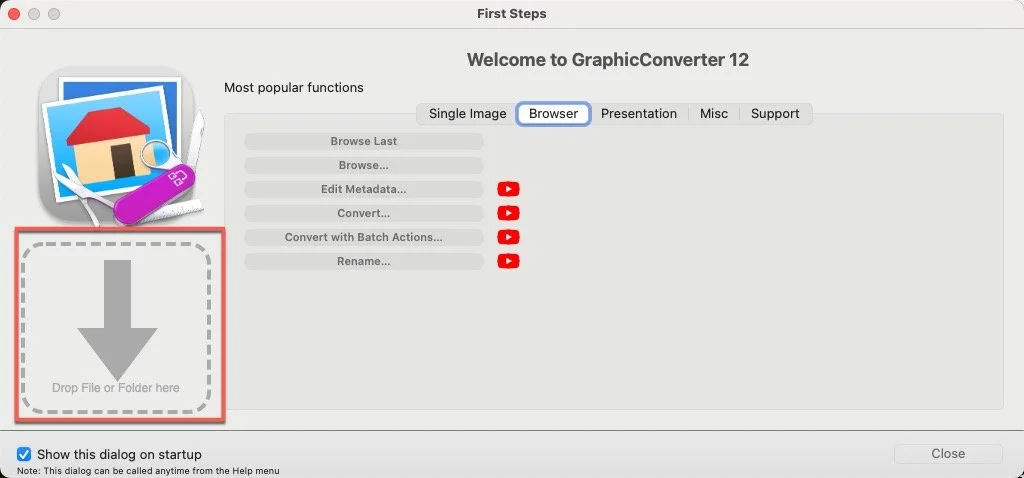
Using Graphic Converter (MAC only software), drag a video file into the file upload box.
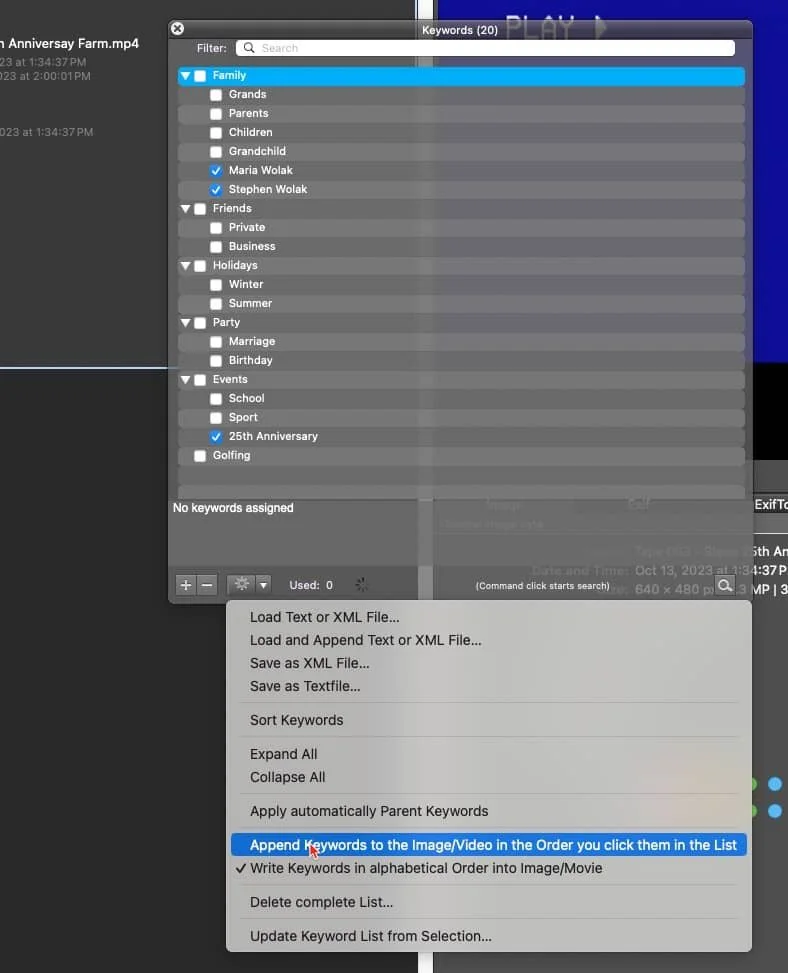
Go to the WINDOWS Menu at the top and click on "SHOW KEYWORDS".
A new dialog box will appear with some basic keywords. To add your own click on the PLUS icon at the bottom. It will create a new 'blank' keyword where you would then type in the keyword(s) that you want to use. Remember, keep your keywords simple. You can use one, two or three word combinations.

Bulk Add Your Keywords
Next, once all of your new keywords have been added, and have the blue check in the box, click the GEAR icon at the bottom. An new menu will dropdown. Choose "Append Keywords to the Image/Video in the order you click them in the list".
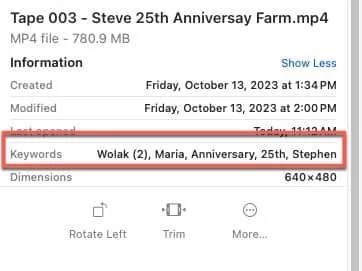
Give it a few minutes to apply the changes and then check your video file in Finder, Adobe Bridge or some other program to double check that you now see your keywords.