Sorting Negatives: A Key Step in Organizing Your Photo Legacy
I've kept every single negative from the time I purchased my first 35mm camera. It was a Canon AE1 Program. I loved that camera. Back in the early 80's it was a newly released SLR that had built in 'programmed' settings that allowed you to switch to taking photos of flowers to sports activities quickly. I learned so much with this camera and it has led me to where I am today with thousands of prints and now owning several digital cameras, still SLRs (Single Lens Reflex).
My love for taking photos was about capturing the moment. Weddings, life changes such as leaving a job, or the excitement of a new baby in the family. You get the idea. If you've been following me for awhile, you probably share in that love of photography like I do.
So, what do you do with all of those negatives. That is, if you haven't thrown them away?! Get them organized and separated from your prints to prevent off-gassing.
What I have been doing slowly is first getting all of my physical media organized and sorted into photo boxes by year. I was lucky because I was the person who kept the prints and negatives in their original development envelops for the most part. As my collection grew, I naturally put them in a new photo box by year. Now that I"m older and my memory is not what it was, I'm grateful that I did that because it has made is so much easier to keep it organized.
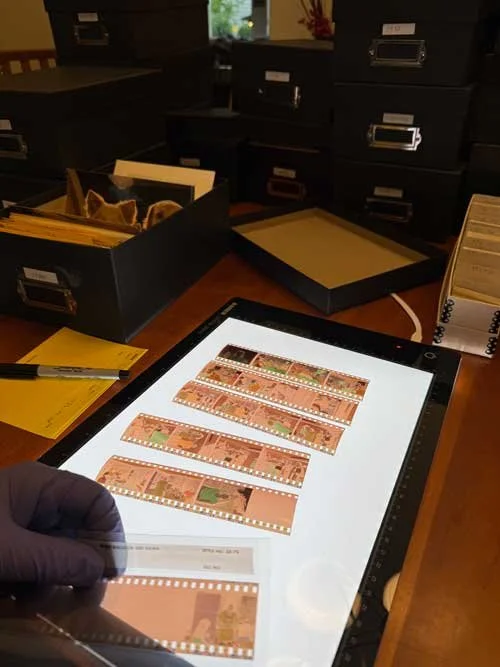
Each photo batch I organize gets a numbered batch card. Using a pen or thin marker, I add the batch card number at the top of the Print File negative sleeve so I can cross-reference where the corresponding prints live. I also jot down the year (or best guess) and a short subject like “1994 – Camping in Estes Park.” If I've already scanned either the prints or negatives, I add a simple “S” to the top of the sleeve as a visual cue.
Why go through all this? Because keeping your prints and negatives organized makes it easier to decide what’s worth scanning—and ensures you’re not duplicating work or missing out on your best-quality originals. Remember, negatives are your highest-resolution source for reprints and digitization.
Pro Tip: A light table makes it SO much easier to see what's on those tiny strips. I use the Kaiser Slimlite Plano (~$150) on sale now at Amazon, and it’s worth every penny.
Supplies I Love:
Print File 35mm Negative Preservers – archival-safe and easy to label.
Batch cards - I buy a bright colored card stock and cut down to use in my photo sorting boxes.
Large stable workspace to have enough space to work.
Nitrile gloves to keep oils off your images.
Every time you take a step to separate and label your negatives, you’re building a bridge between the past and the future. It’s like adding breadcrumbs for your future self—or for a family member who picks up the photo torch down the road.
Need help getting started? Don’t hesitate to reach out. I love helping others bring order to their memory chaos.
Keep saving those memories—one strip of film at a time.

